
Configuring Certificate Settings
Configuring Password Vault
Before you Begin
The prerequisites for
configuring the Password Vault in AppViewX as are follows:
- A valid certificate password for password-protected certificates to decrypt.
- You have the Password Vault Modify permission.
- If you want to use a HashiCorp credential, HashiCorp must be configured in , and the target credential must exist.
- If you want to assign an Onboarding Group, the group must be configured in Device Onboarding Settings.
-
Go to
 .
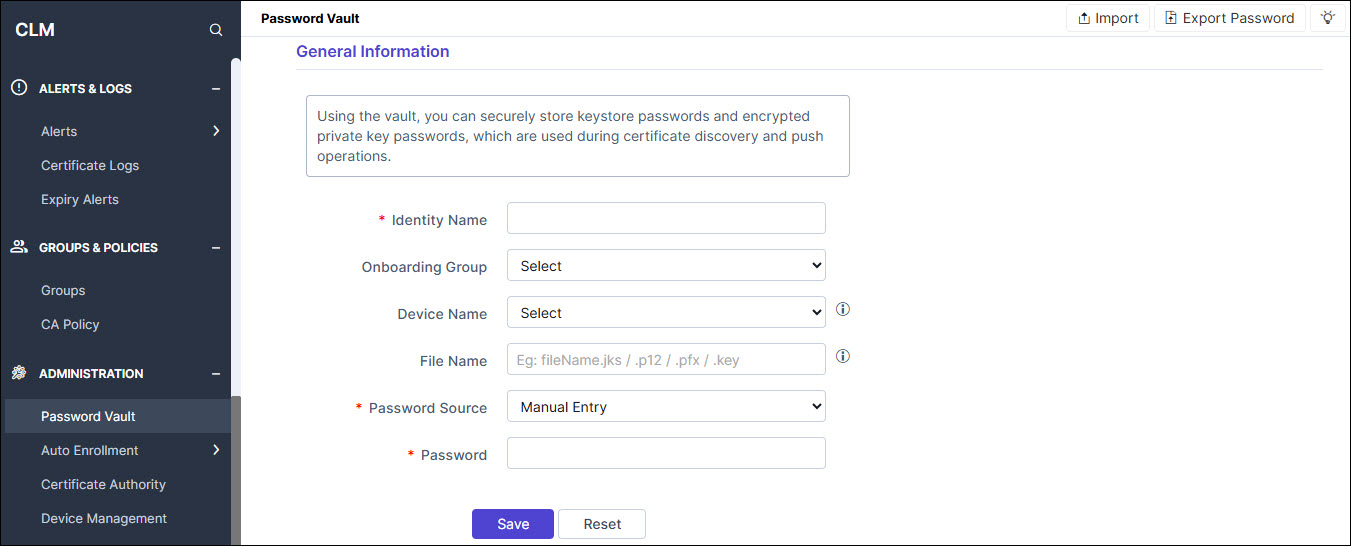
.
-
Enter an Identity Name of the password you want to
add in the vault.
The identity name uniquely identifies the vault entry.
-
Optional, select an Onboarding Group from the
drop-down list.
The list displays all configured Device Onboarding Groups. Leave this field blank if no onboarding group association is needed. To create a new Onboarding Group, go to CLM > Device Management > Onboarding Group.
- Optional, select Device Name from the dropdown list, select the device whose password-protected certificate details you want to store.
-
Optional, enter a certificate file name to help users identify in the
File Name field.
Example: fileName.jks / .p12 / .pfx / .key
-
Select the Password Source.
Password Source Action Manual Entry Enter the password in the Password field that is associated with the certificate. The password is encrypted and stored in AppViewX. Credential List - HashiCorp Select the credential from the Password Identifier drop-down list. The list shows all credentials available in the HashiCorp integration. No local password is stored. Note: If a Password Vault is not associated with any specific device or Onboarding Group, it can be used to parse password-protected certificates discovered across all devices. -
Click Save.
The vault entry appears in the Password Vault grid. If you selected Credential List - HashiCorp, the corresponding credential in the Credential Library is marked Active and the identity name appears in the Associated Identities section of the Active popup.Note: When parsing password-protected certificates discovered from a device, Password Vaults are considered in the following order of priority:
- Device-level Password Vault: A Password Vault mapped directly to the device takes the highest priority.
- Onboarding Group-level Password Vault: If no Password Vault is mapped directly to the device, the Password Vault mapped to the device’s Onboarding Group is used as the second priority.
- Global Password Vault: If no Password Vault is associated with either the device or its Onboarding Group, a Password Vault that is not mapped to any specific device or Onboarding Group can be used to parse password-protected certificates across all devices.
Import Password Vault Entries
Note: For Password Vault import using manual entry,
please provide the password in Base64-encoded format in the
Password column.
- Go to .
- Click Import and then click Sample File to get the current seven-column template.
-
Fill in the sample file.
Tip: Leave the password column blank for any row using HashiCorp as the Password Source.
-
Select your completed file and click Upload.
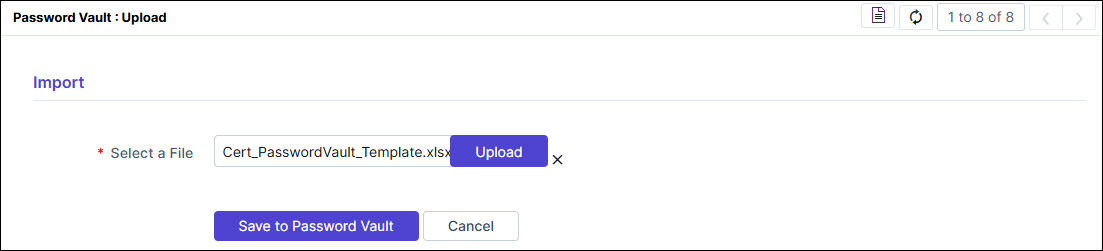
-
Review the preview grid and resolve any validation errors shown in
red.
Common errors include:
- Invalid onboarding group name: The name must exactly match a configured group.
- Invalid Password Identifier: The credential name must exist in the HashiCorp integration.
- Missing password: A password is required for Manual Entry rows.
- Missing Password Identifier: Password Identifier is required for HashiCorp rows.
- Select the rows you want to commit, then click Save to Password Vault to save the valid entries.
Credential List - HashiCorp Vault, the
referenced credential in the Credential Library is automatically marked
Active.Export Password Vault Entries
- Click Export Password on the top-right to export all stored certificate passwords from the vault as a zip file to your computer.
- To modify the existing details, Click Edit.
-
To update the password, click Update.
Important: When editing an existing Password Vault Identity, a caution message is displayed indicating that the identity may be associated with one or more Push App Connectors and that changes could affect certificate push operations. Review the impact before saving updates.
-
To delete the password details, click Delete.
Note: If the password identity is associated with one or more application connectors, deleting it may impact certificate push operations.Important: Before deleting a Password Vault Identity, AppViewX displays a confirmation prompt with the following message: This password identity may be associated with one or more application connectors. Deleting it could impact certificate push operations. Select Confirm to proceed with deletion, or Cancel to abort.Note: The WindowsCertificateStore identity name will be used to parse certificates discovered from the Windows certificate store. Edit and delete actions are not allowed.
Password Protected Certificates
-
Go to (Menu) >
CLM > CERTIFICATE
DISCOVERY > Discovery Status >
OnDemand.
- Click on the discovery name under discovery inventory.
- Click Certificates under the tab.
-
To view all password-protected certificates, select Password
Protected Certificates from the dropdown.
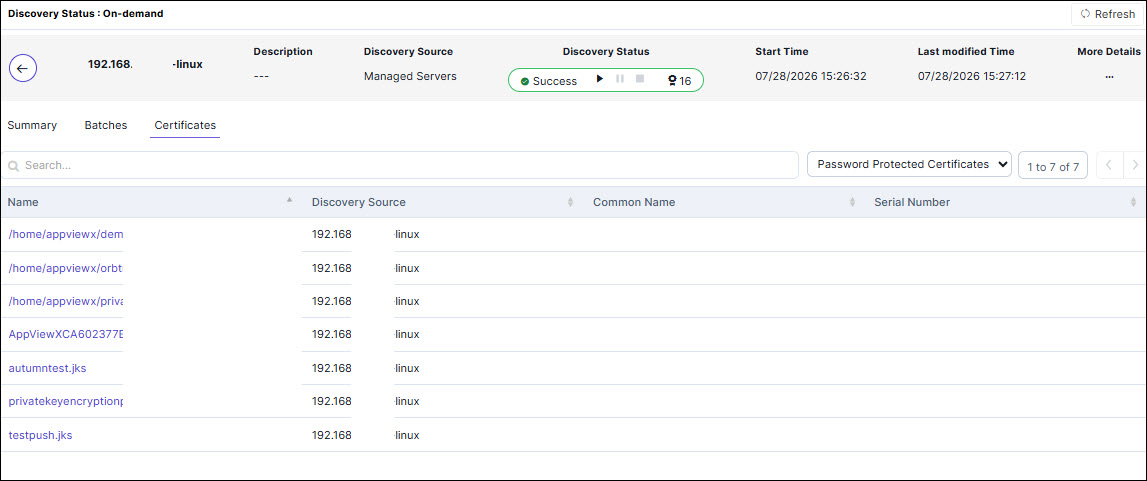
- To view the encrypted private keys that could not be parsed due to a missing password in the password vault, select the Encrypted Private Keys from the dropdown.
